
Making your own resin lamp is easier than most beginners expect. While it combines resin casting and basic lamp assembly, the process can be broken down into simple, manageable steps. The result is a functional piece of décor that is completely customized to your style.
In this guide, we walk through how to make a resin lamp from start to finish, including the materials you’ll need, how to add decorative elements, assemble the hardware, and safely power on the finished lamp.
In details, here are the highlights rounded up just for you:
- Resin lamp making process: Gather materials → pour resin → add decorations → cure → demold and finish → assemble hardware → test the lamp safely.
And don’t forget to check the mistakes and safety guidelines in each step as we dive deep into such resin lamp DIY projects. Now, let’s get the ball rolling!

Can You Make a Resin Lamp at Home? Does Anyone Actually Make It?
Yes, and people make DIY resin lamp projects all the time. Also, you do not need a professional workshop to do it. A handmade resin lamp is genuinely achievable as a home DIY project with a clean, well-ventilated space, a basic materials list, and a few hours spread across two or three days (most of which is just waiting for resin to cure).
The process on how to make a resin lamp does have real steps that need to be done in order, and a few of them require care. Such steps involve mixing resin at the right ratio, drilling through cured resin without cracking it, and wiring the lamp kit correctly. Yet, none of these are beyond a confident beginner. They just need to be understood before you start, not learned by making expensive mistakes halfway through.
The style of lamp you want to make changes how complex the project is. Some builds are straightforward, and refer to this list below:
- Solid colored base lamps: A colored resin casting with a standard lamp kit on top. A great first project.
- Petri dish or alcohol ink effect lamps: Resin poured with flowing ink patterns for a glowing, translucent result.
- Botanical or preserved flower lamps: Real dried flowers, leaves, or petals embedded in clear resin.
- Ocean or layered effect lamps: Multi-layer pours in blues and teals, often combined with shells or sand.
- Wood and resin river lamps: Live-edge wood combined with colored resin, a more advanced build requiring wood prep and sealing before pouring.
If you are looking for more DIY resin lamp ideas before committing to a style, our full resin lamp ideas guide covers all of these in detail, including which are realistic for a first attempt and which are better approached once you have a pour or two under your belt.
What You’ll Need to Make a DIY Resin Lamp
Before learning how to make a resin lamp, gather all of your materials and tools. Resin projects are time-sensitive once mixing begins, so having everything prepared in advance helps prevent mistakes and makes the process much smoother.
Lamp Base (Usually Wood)

Most DIY resin lamps use a wooden base to support the lamp hardware once the resin piece is finished. This can be a wooden board, a live-edge slab, or a turned wood base.
The wood must be completely dry before use. Moisture trapped inside the wood can cause bubbling, poor adhesion, and other curing issues. Kiln-dried hardwoods such as walnut, oak, and ash are popular choices because they are stable and durable. If you plan to use reclaimed or foraged wood, allow sufficient drying time and inspect it carefully before starting.
Resin and Resin Mold
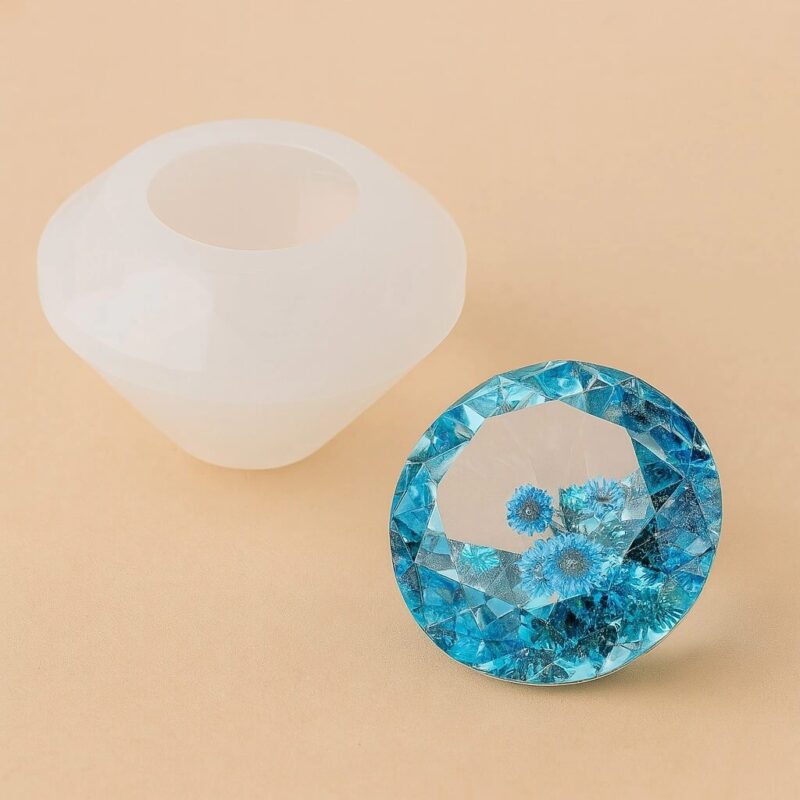
For resin lamp projects with significant thickness, use a deep-pour epoxy resin rather than a standard casting resin.
Deep-pour formulas cure more slowly and release heat gradually, reducing the risk of cracking, overheating, or yellowing in thicker pours.
For the mold, you can use:
- A silicone lamp mold
- A custom mold made from melamine or acrylic
- A container that becomes part of the final design
Silicone molds are often the easiest option because cured resin releases cleanly without the need for additional tools. Hard-sided molds typically require a mold release agent.
Lamp Kit
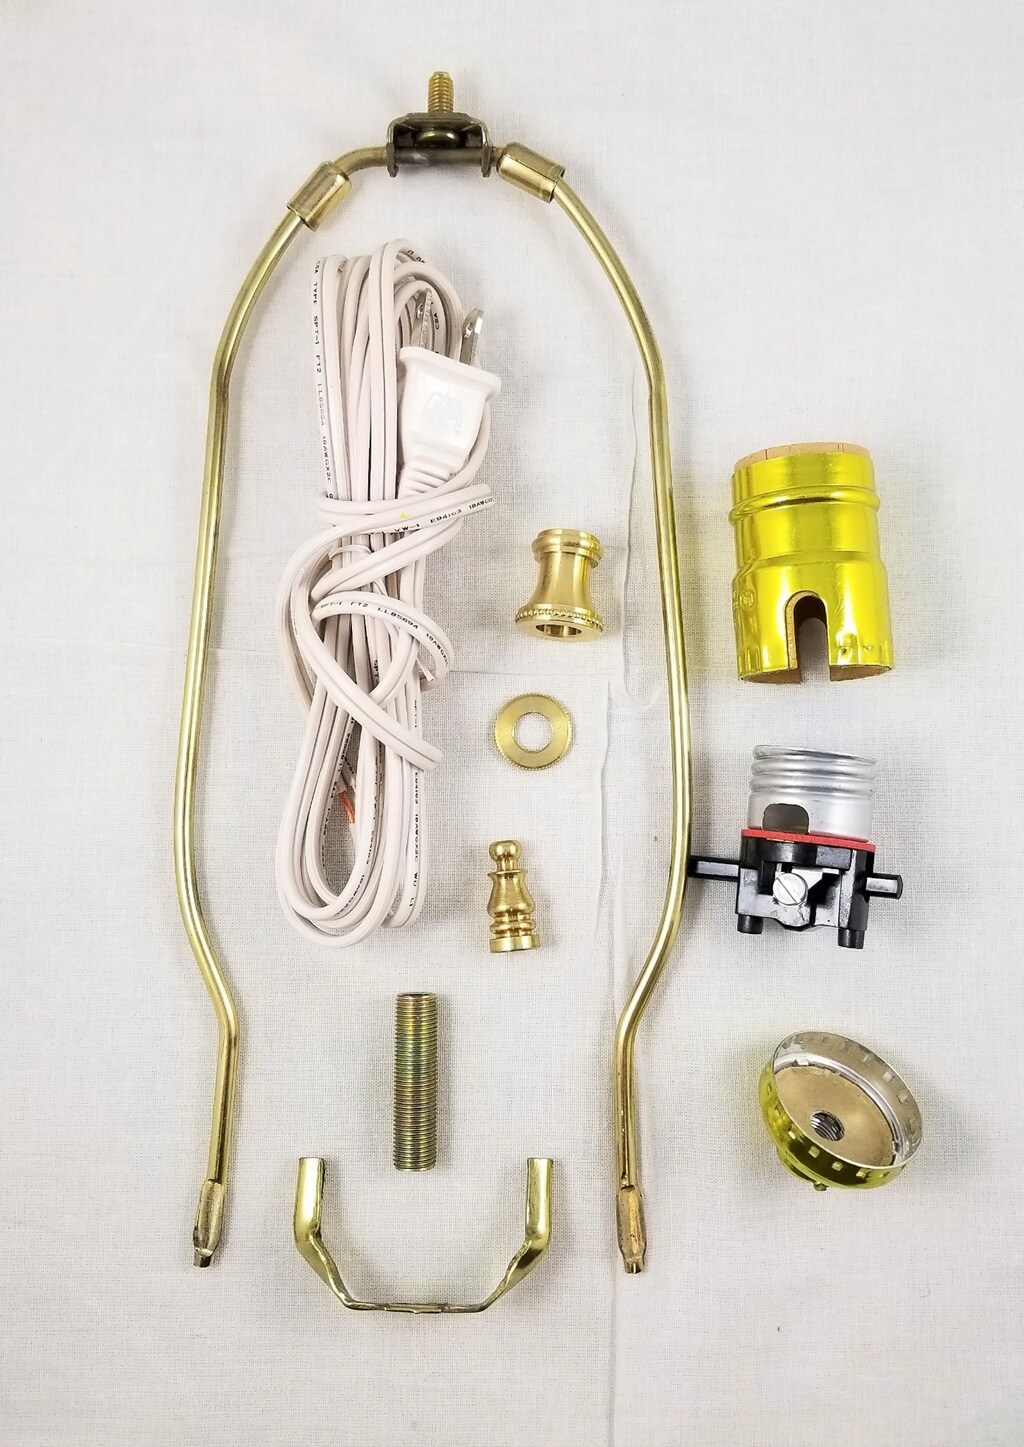
A lamp kit contains the components needed to turn your resin piece into a functioning lamp.
Most kits include:
- Lamp socket
- Threaded rod
- Lamp harp
- Power cord
- In-line switch
- Plug
The threaded rod runs through the center of the lamp base, providing structural support while creating a path for the electrical cord.
Colorants and Decorative Inclusions
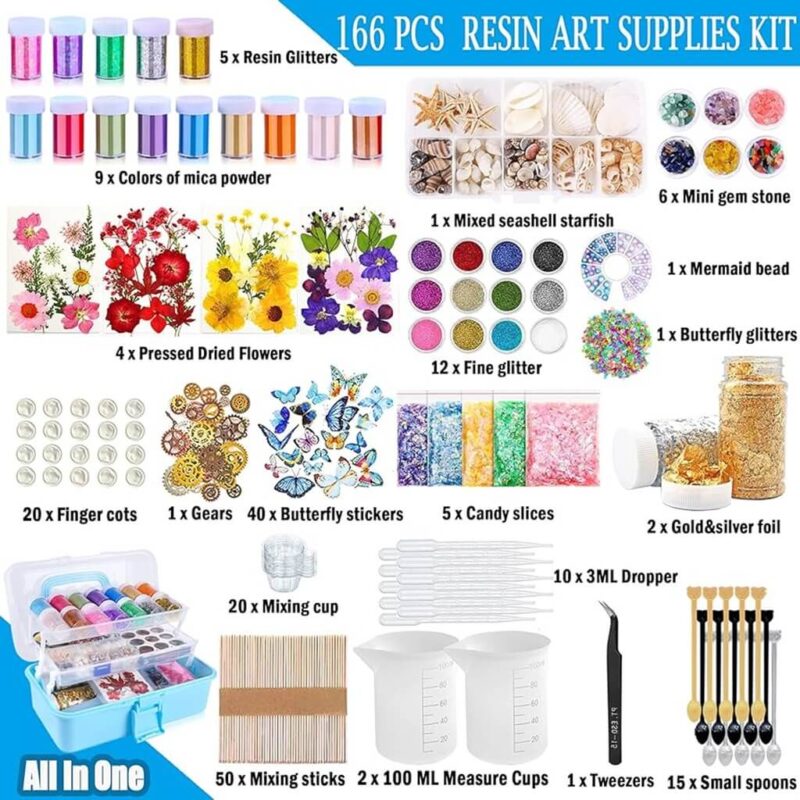
The colorant you choose will influence both the appearance of the lamp and how it interacts with light.
Common options include:
- Mica powder: Metallic and pearlescent effects
- Alcohol ink: Transparent color and flowing patterns
- Pigment paste: Solid, opaque color
You can also embed decorative inclusions such as:
- Dried flowers
- Shells
- Glitter
- Preserved foliage
For best results, decorative inclusions are usually added after an initial resin layer rather than directly at the beginning of the pour.
Mixing Sticks
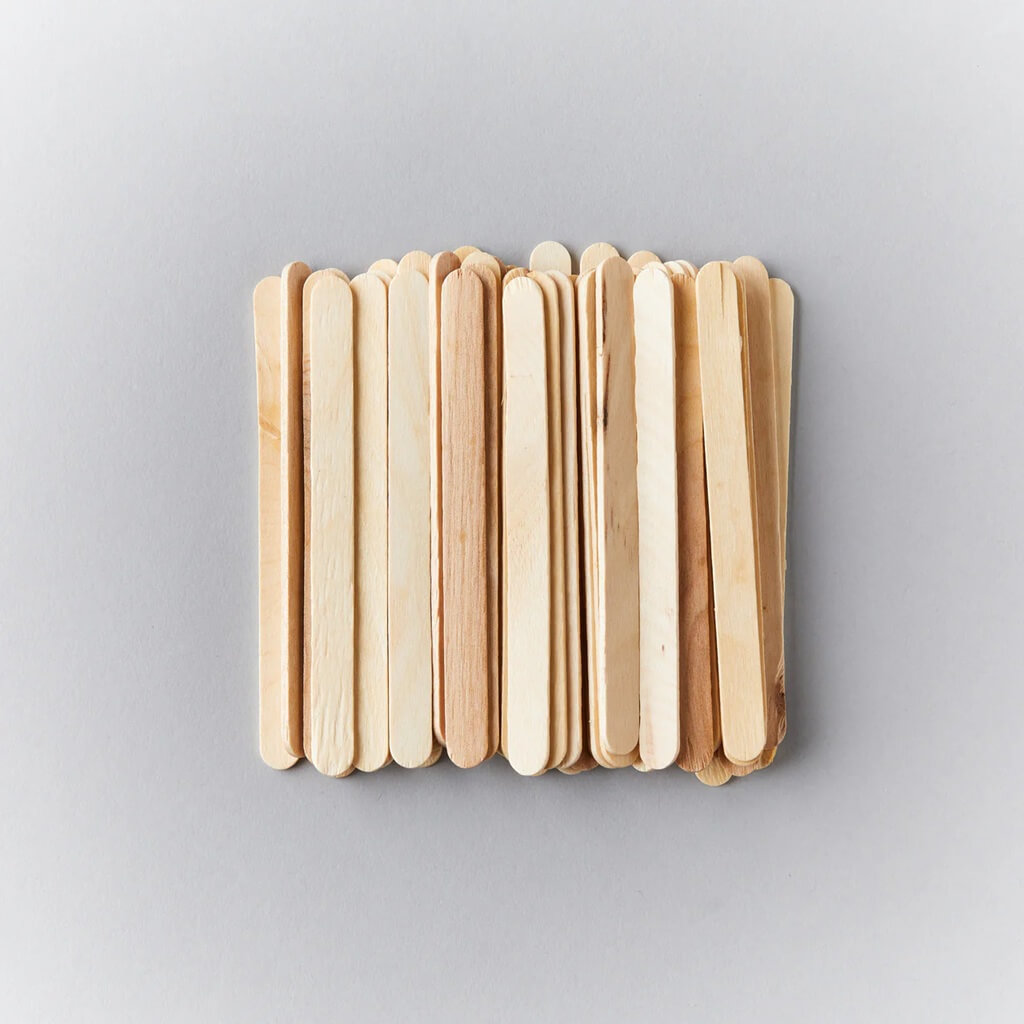
Wooden craft sticks and silicone spatulas are both suitable for mixing resin.
Keep separate tools for mixing and scraping the sides of the cup. Avoid reusing sticks that contain cured resin residue, as hardened particles can contaminate future pours.
Sandpaper
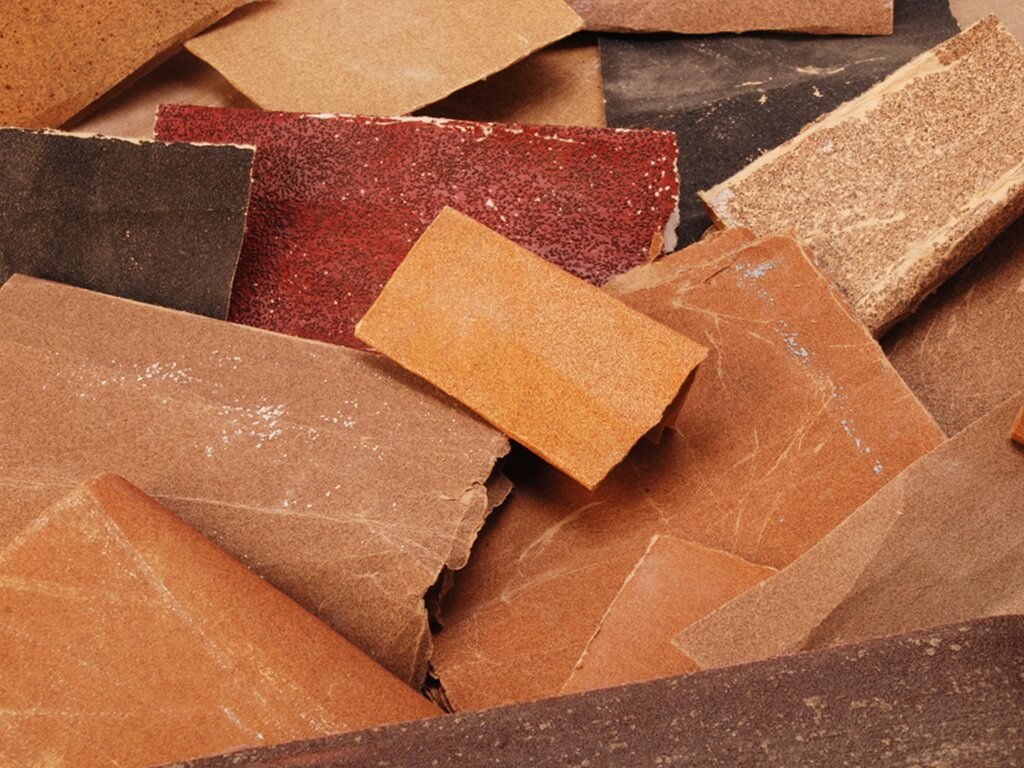
Finishing a resin lamp requires multiple sanding stages.
A typical progression includes:
- 80 grit
- 220 grit
- 400 grit
- 800 grit
- 1000 grit
- 1500 grit
- 2000 grit
For finer grits, wet sanding helps reduce heat buildup and produces a smoother surface before polishing.
Measuring Cups
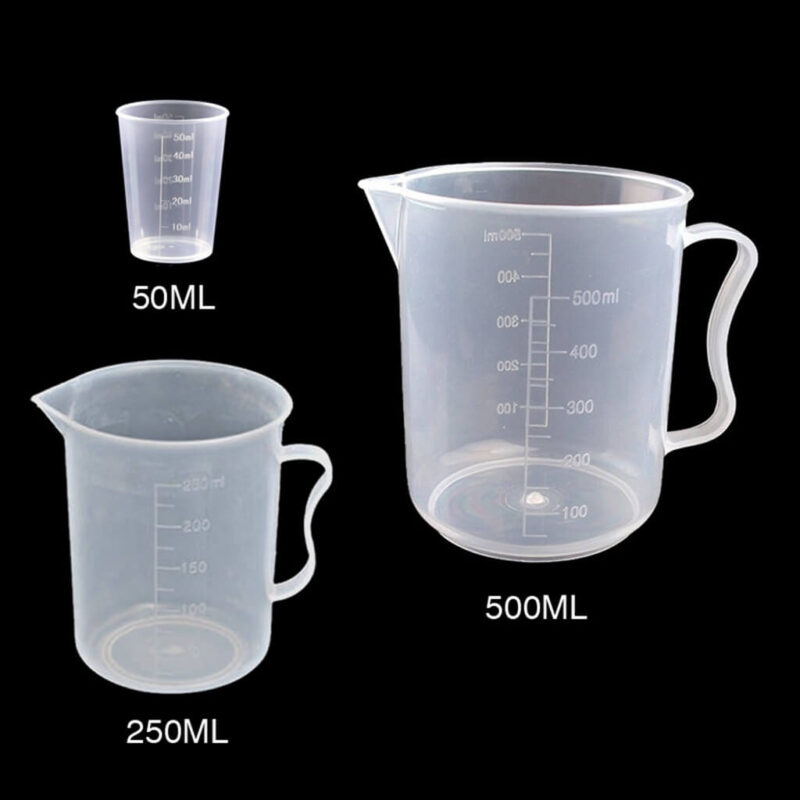
Accurate measurements are essential for successful resin curing.
Use graduated mixing cups marked in milliliters or ounces. For larger pours, a digital scale can provide even greater accuracy because resin and hardener may have different densities.
Safety Equipment
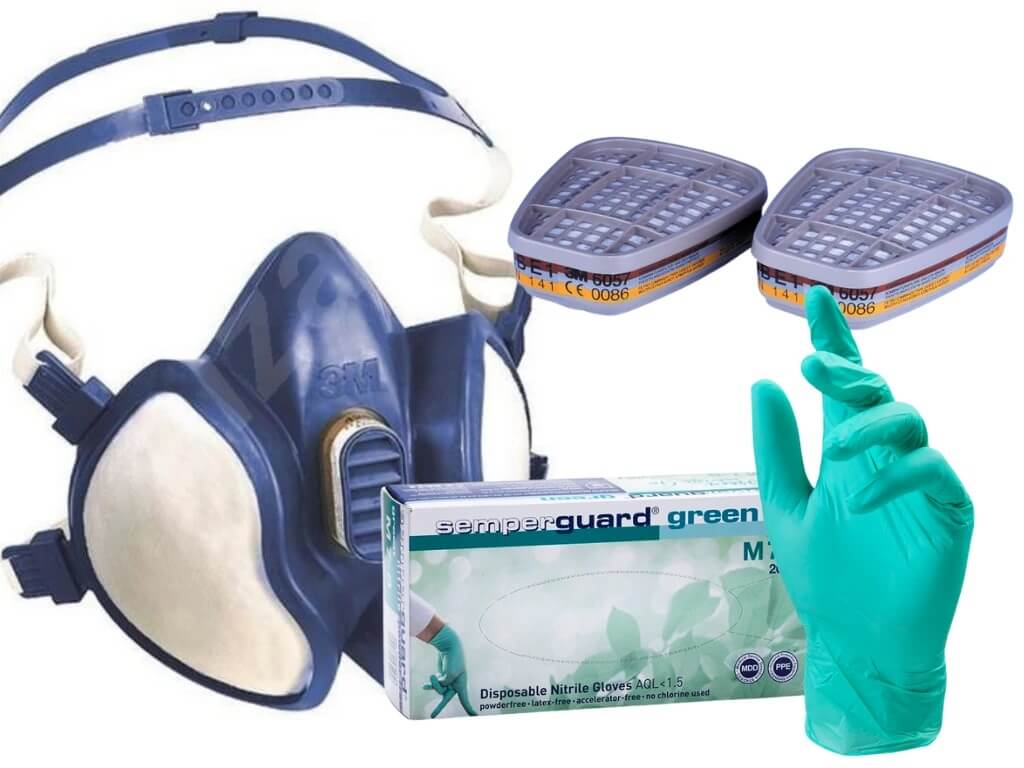
Do not skip safety equipment when working with epoxy resin.
At minimum, prepare:
- Nitrile gloves
- Safety glasses or goggles
- A respirator fitted with organic vapor cartridges
Nitrile gloves provide better protection than latex gloves, while a respirator helps reduce exposure to resin vapors during mixing and pouring. A standard dust mask is not designed for this purpose and should not be considered a substitute.
How to Make a Resin Lamp, Step by Step?
A note on time before we begin: this project spans at least two full days, and usually three. Day one is the pour. Day two or three is demolding, drilling, and sanding. Final assembly happens after sanding.
There is no shortcut to the cure time, and rushing it is the most common cause of soft, tacky, or cracked results. Now let’s get to our detailed tutorial on how to make resin lamps!
Step 1: Measure, Mix, and Blend Your Resin
When learning how to make a resin lamp, this is the stage where most beginner mistakes happen. Fortunately, they are also some of the easiest mistakes to avoid.
- Check Your Workspace Temperature
Most epoxy resins perform best between 75°F and 85°F (24°C–29°C).
- Below 70°F (21°C), resin becomes thicker and harder to mix.
- Cooler temperatures can slow curing significantly.
- Above 90°F (32°C), resin may cure too quickly and generate excess heat.
If your resin feels unusually thick, place the unopened bottles in warm water for about 10 minutes before mixing. Never microwave resin.
- Measure the Resin and Hardener
Follow the manufacturer’s recommended mixing ratio exactly.
Common ratios include:
- 1:1
- 2:1
- 3:1
Before combining the components:
- Use separate measuring cups for resin and hardener.
- Double-check whether your product measures by volume or weight.
- If using a digital scale, verify the weight ratio in the manufacturer’s instructions.
Even small measurement errors can cause curing problems later.
- Mix Thoroughly
Pour both components into a clean mixing cup.
Then:
- Stir slowly for 3–5 minutes.
- Scrape the sides and bottom regularly.
- Continue mixing until the resin appears clear and uniform.
Many experienced resin artists also use the two-cup method:
- Mix in the first cup.
- Transfer the mixture into a second clean cup.
- Stir for another minute.
This helps prevent unmixed material from remaining on the sides of the original container.
4. Know Your Working Time
Most casting resins provide a working time of approximately 30–45 minutes, although this varies by brand and room temperature.
Once the resin is fully mixed:
- Prepare to pour promptly.
- Avoid unnecessary delays.
- Complete any color mixing or preparation before the working window begins to close.
Common mistakes:
- Under-mixing. Five minutes of slow stirring feels like a long time. Do it anyway. Inadequately mixed resin will not cure properly and leaves sticky soft spots.
- Measuring by eye. The ratio is a chemical reaction requirement. Even being slightly off can prevent full cure.
- Working in a cold room. If your resin is thick and hard to stir, warm the unopened bottles in a bowl of warm water for 10 minutes before measuring. Never microwave them.
Step 2: Pour Your Resin into the Mold
With your mold cleaned, dry, and prepared, you are ready to pour.
- Pour Slowly
Pour the resin into the mold using a slow, steady stream.
For best results:
- Keep the cup close to the mold.
- Pour from a low height.
- Avoid splashing or sudden movements.
This helps reduce trapped air bubbles.
- Pour Thick Casts in Stages
If your DIY resin lamp requires a thick cast, avoid filling the mold all at once unless your resin manufacturer specifically recommends it.
A common approach is to:
- Pour a layer up to about 2 inches (5 cm) thick.
- Allow it to reach a partial cure.
- Add the next layer.
Depending on the resin formula and room conditions, partial curing may take approximately 4–8 hours.
Layered pouring helps:
- Reduce heat buildup
- Minimize cracking
- Prevent yellowing
- Improve clarity in thick casts
3. Remove Surface Bubbles
After pouring:
- Use a heat gun held several inches above the surface.
- Make a few quick passes.
- Avoid concentrating heat in one area.
If you are using alcohol inks or decorative effects, a heat gun is generally safer than an open-flame torch.
4. Protect the Resin While It Cures
Once bubble removal is complete:
- Cover the mold with a clean cardboard box or dust cover.
- Keep the curing area free from debris.
- Avoid placing plastic wrap directly on the resin surface.
Common mistakes:
- Pouring too deep in one go. The exothermic reaction in a thick single pour builds up heat in the center that cannot escape. This can crack or yellow the resin before it even finishes curing.
- Skipping bubble removal. Bubbles that are not addressed in the first 10 minutes become permanently locked in once curing progresses.
- Disturbing the mold during cure. Even small vibrations can cause color to shift or inclusions to move. Put the mold somewhere it will not be touched for at least 24–48 hours.
Step 3: Add Decoratives to Your Resin Lamp
If your design includes inclusions such as dried flowers, shells, foliage, glitter, small stones, they do not go in with the initial pour. Lightweight elements float. Heavy elements sink. Adding them to fully liquid resin means they will end up wherever the resin decides to put them, not where you placed them.
The right approach is a partial pour-and-cure method:
- Pour a base layer of resin: About one-third to one-half of the total mold depth.
- Allow it to reach a partial cure: firm enough to hold an inclusion in place without it sinking, but still tacky enough to bond to the next pour. This takes roughly 4–8 hours. Test gently with a gloved finger: It should feel like the surface of a sticker.
- Arrange your inclusions on the partially cured surface exactly where you want them.
- Mix fresh resin and pour the remaining volume slowly over the top. Pour gently so the stream does not displace the inclusions.
- Remove any new bubbles with a brief heat gun pass.
- Cure undisturbed for 24–48 hours.
For alcohol ink effects like petri dish, cloud, layering, the ink goes into the wet resin immediately after the pour, before curing begins. See our full alcohol ink resin techniques guide for ratios and step-by-step method for each effect specifically.
Common mistakes:
- Adding inclusions to fully liquid resin. Lightweight botanicals will float to the surface. Heavy elements will sink. The partial cure stage exists precisely to hold things in place.
- Using inclusions that still have moisture in them. Even slightly damp dried flowers will cause bubbling and cloudiness in the resin around them. Make sure everything going into the resin is fully, completely dry.
- Forgetting to test the partial cure timing. The window varies by resin brand and room temperature. If you pour too early, inclusions move. If you wait too long, the layers will not bond properly and you will get a visible delamination line.
A note for cure time: Leave the completed pour undisturbed for a minimum of 48 hours at room temperature (75°F–85°F / 24°C–29°C) before demolding. Thicker pours and cooler rooms need more time. When in doubt, wait an extra 12 hours rather than demolding too early.
Step 4: Demold, Drill a Channel, Sand, and Polish
Demolding & Drilling
Once the resin is fully cured, not tacky, solid all the way through, gently flex the silicone mold to release it. Do not force it. If the resin is not releasing cleanly, the mold may need more time.
- Demolding and initial inspection: Inspect the piece for rough edges, bubbles near the surface, or any cloudiness. Light surface cloudiness is almost always fixable with sanding. Bubbles that are fully enclosed inside the piece cannot be removed at this stage — they are permanent.
- Drilling the cord channel: This is the step most tutorials either skip or gloss over, and it is the one that most commonly goes wrong for first-timers.
The cord channel is a vertical hole drilled through the center of the resin base from bottom to top, sized to accommodate the threaded lamp rod. The rod is typically 10mm (3/8″) in diameter. You should confirm this before choosing your drill bit.
Key drilling rules:
- The resin must be completely cured before drilling. Partially cured resin will gum up the drill bit and collapse the hole.
- Use a carbide or diamond-coated drill bit. Standard twist bits can work on resin but carbide bits stay sharper longer and produce a cleaner edge. For holes larger than 6mm, a carbide-tipped step bit or spade bit designed for hard materials gives better results than a standard twist bit.
- Drill at low speed with light, steady pressure. High-speed drilling generates friction heat. Resin has a glass transition temperature. It means the point at which it starts to soften, and that is well below what a fast-spinning drill bit can produce. Low speed, let the bit do the work.
- Cool the bit with water. Keep a small container of water nearby and dip the drill bit every 30 seconds. This prevents overheating and keeps the edges of the hole clean.
- Mark and secure the piece first. Use a pencil or a strip of painter’s tape to mark the drill point. Tape keeps the drill from wandering at the start. Clamp or hold the resin piece firmly in a vise. Do not hold it freehand.
If the drilled hole looks frosted rather than clear, this is normal. Running a toothpick coated in a small amount of freshly mixed clear resin around the inside of the hole will improve the appearance. But do this only if the frosted look bothers you, as it will not affect the finished lamp at all once hardware is assembled through it.
Sanding progression:
Starting with 80 grit, sand the exterior of the resin piece to flatten any surface irregularities, remove mold lines, and smooth rough edges. Progress through 220, 400, 800, 1000, and finish with 1500–2000 grit. From 1000 grit upward, wet-sand: keep the surface slightly damp with water as you work. This prevents overheating, reduces scratches, and produces a much cleaner surface for the polishing stage.
Polishing:
Once the 2000 grit stage is complete, buff the surface with a polishing compound designed for plastics or car headlights. Apply with a soft cloth or microfiber pad in circular motions. The surface will go from matte-sanded to glossy as you work. Finish with a coat of paste wax buffed to a shine. For wood elements combined with resin, apply a wood oil or wax to those areas separately.
Common mistakes:
- Drilling too fast. The resin will soften, the bit will jam, and the hole edge will be rough and melted-looking rather than clean.
- Skipping grit steps when sanding. Going from 400 directly to 2000 does not work — the deep scratches from the coarser grit are still there, they are just compounded by the finer scratches from the 2000. Every grit step removes the scratches from the one before it.
- Polishing without completing the sanding sequence. Polish is for a surface that is already smooth. It cannot compensate for skipped sanding steps.
Step 5: Assemble the Lamp Hardware
With the resin body finished and the cord channel drilled, it is time to assemble the electrical components. This step is straightforward with a plug-in lamp kit, it is designed for DIY assembly, even for our case – a DIY resin lamp.
Permanent hardwired installations are a different matter and should be handled by a licensed electrician. Remember to check on that.
Standard plug-in lamp kit assembly, step by step:
- Thread the lamp cord up through the drilled channel from the bottom of the resin base.
- Thread the threaded rod through the same channel. The rod should fit snugly. Secure it at the base with the provided nut and washer.
- At the top of the rod, attach the socket cap. Feed the cord wires through the socket housing.
- Connect the wires to the socket terminals. In a standard two-wire cord, the neutral wire (the one with ribbing or a white stripe) connects to the silver screw. The hot wire (smooth, or black-striped) connects to the brass screw. Tighten both screws firmly.
- Snap or screw the socket shell together over the socket cap.
- Attach the harp saddle and harp.
- Fit a strain relief fitting at the bottom where the cord exits the base — this prevents the cord being pulled and stressing the wire connections.
- Attach the plug at the end of the cord following the package instructions.
A note on the socket: make sure the socket is rated for the bulb type and wattage you plan to use. For a resin lamp, the bulb must be LED. We explain why in the safety section below.
Common mistakes:
- Connecting wires to the wrong terminals. Reversed polarity in a lamp does not usually prevent it from working, but it does mean the socket shell is energized rather than neutral. This can be a shock hazard. Neutral to silver, hot to brass, always.
- No strain relief. A cord pulled from below without strain relief will eventually pull the wire connections loose at the socket. The strain relief fitting is a small part that makes a significant long-term difference.
- Using a socket rated for incandescent wattage with an LED bulb. This is fine. LED bulbs draw far less wattage than their incandescent equivalents. The concern runs the other way: do not put an incandescent bulb in a socket spec’d only for low wattage, and never use an incandescent bulb in a resin lamp at all.
Step 6: Full Assembly and Power Check
Attach the lamp shade (if using one) to the harp. Place the assembled lamp on its intended surface. Plug it in and switch it on.
If the lamp does not light:
- Check that the bulb is fully seated in the socket.
- Check the in-line switch position.
- Check that the plug is fully inserted in the outlet.
- If none of these solve it, unplug, disassemble the socket, and re-check the wire connections at the terminals.
If the lamp flickers:
- Usually a loose connection at the socket terminals. Unplug, tighten both screws, reassemble, and test again.
If it lights correctly, run it for 30 minutes and check: the lamp base (the resin piece) should stay at or near room temperature. Noticeable warmth in the resin itself is a sign that the bulb is running too hot, switch to a lower-wattage or higher-quality LED.
Important Safety Guidelines When Making a DIY Resin Lamp
Making a DIY resin lamp is a beginner-friendly project, but it involves working with epoxy resin, power tools, and electrical components. Taking a few basic precautions can help you avoid common safety issues and create a lamp that remains safe to use long after the resin has cured.
Ventilation and Workspace
Work outdoors whenever possible, or in a well-ventilated space with consistent airflow. An open window alone is not always enough. Ideally, use a fan to direct air away from your workspace while mixing and pouring resin.
It is important to remember that epoxy resin fumes are not always strong-smelling. A mild odor does not necessarily mean the environment is safe for prolonged exposure. When working with uncured resin, wear nitrile gloves, eye protection, and a respirator fitted with organic vapor cartridges. A standard dust mask is not designed to filter resin vapors.
The same level of care applies after the resin has cured. Sanding creates fine dust that can irritate the skin, eyes, and respiratory system. Wear appropriate respiratory and eye protection during this stage as well.
Electrical and Heat Safety
LED bulbs are the safest choice for resin lamps because they generate significantly less heat than incandescent or halogen bulbs.
Excessive heat can gradually soften resin near the socket, affect the shape of the lamp, and potentially create long-term safety concerns. For this reason, avoid using incandescent or halogen bulbs in resin-based lighting projects.
If you plan to embed lighting directly inside the resin, use low-voltage LED products designed for decorative applications. Many makers prefer waterproof 5V USB-powered LED strips because they produce minimal heat and are widely available.
When using alcohol inks, avoid open flames during the pouring process. Alcohol-based inks can remain flammable until they are fully encapsulated within cured resin, making a heat gun the safer option for bubble removal.
Resin Disposal and Cleanup
Allow leftover resin, mixing cups, stir sticks, and resin drips to cure completely before disposal. Uncured resin should never be poured down a sink or drain.
Once fully cured, epoxy resin is generally considered stable for normal handling and can often be disposed of with household waste, although disposal requirements vary by location. Always check local regulations if you are unsure.
One final mistake to avoid is pouring leftover mixed resin back into the original bottles. Even a small amount of activated resin can begin curing inside the container and ruin the remaining product.
How to Make a Resin Lamp: Frequently Asked Questions
Is epoxy resin an expensive hobby?
The biggest expense is getting started. For a first project, you will typically need resin, a mold, mixing supplies, safety equipment, and basic finishing tools. Depending on the materials you choose, a beginner setup often costs between $50 and $100 or more.
The good news is that many of these items are reusable. Once you own the tools, your main ongoing costs are usually resin, colorants, and decorative inclusions.
If you want to make a resin lamp, you should also budget for a lamp kit and an appropriate mold. While the initial investment is higher than smaller resin crafts, the cost per project becomes much lower as you continue making new pieces.
One of the easiest ways to avoid unnecessary expenses is to measure carefully and follow the manufacturer’s instructions. Failed pours and wasted resin are often more costly than the materials themselves.
Can I do resin art while pregnant?
This is a question that should be taken seriously. While research on specific resin products varies, many health authorities recommend minimizing exposure to epoxy resin chemicals during pregnancy whenever possible.
If you are pregnant, trying to conceive, or breastfeeding, consider discussing resin use with your healthcare provider before starting a project. Some experts recommend avoiding the mixing stage entirely because this is when exposure to uncured resin is highest.
If you decide to continue working with resin, take extra precautions:
- Work in a well-ventilated area.
- Wear a respirator fitted with organic vapor cartridges.
- Use nitrile gloves and eye protection.
- Minimize the amount of time spent handling uncured resin.
Always review the safety documentation provided by your resin manufacturer and follow any guidance from your healthcare provider.
Is it safe to put lights in resin?
Yes, provided you use the correct lighting components.
For a DIY resin lamp, LED bulbs are the safest option because they produce significantly less heat than incandescent or halogen bulbs. Excessive heat can gradually soften resin near the socket and may affect the long-term durability of the lamp.
If you plan to embed lights directly inside the resin, choose low-voltage LEDs designed for decorative applications. Many makers use 5V USB-powered LED strips or battery-operated fairy lights because they generate minimal heat and are widely available.
As a general rule, use LED lighting only and avoid high-heat bulb types.
Do resin lamps last?
A well-made resin lamp can last for many years.
The resin itself is highly durable when properly cured and kept indoors. The two factors that have the biggest impact on longevity are heat and ultraviolet (UV) exposure. Over time, direct sunlight can contribute to yellowing, while excessive heat can affect the resin around the lamp hardware.
To maximize the lifespan of your lamp:
- Use a quality resin designed for decorative projects.
- Choose LED bulbs instead of heat-producing alternatives.
- Avoid prolonged exposure to direct sunlight.
- Follow proper curing and finishing procedures during construction.
With the right materials and reasonable care, a resin lamp can remain both functional and visually appealing for many years.
Making a resin lamp at home is satisfying. It also takes 2-3 days minimum, costs $50-100 in startup materials, exposes you to resin fumes and sanding dust, and produces results that depend on a lot of small decisions you can’t take back once the resin starts to cure.
For some projects, a colored base lamp, a simple botanical inclusion, a learning piece, that trade-off makes sense. For others, especially detailed scene work, deep pours, and pieces with embedded characters or dioramas, the time and material cost of figuring it out yourself adds up quickly.
At bitcraftart, we’ve poured thousands of lamps. The techniques described above are the same ones we use in our workshop in Hanoi, refined over years of attempts. If you want to see what these techniques produce in finished form or if you’ve read this far and decided you’d rather skip the learning curve our collection covers everything from flower lamps to diorama epoxy lamp, all handmade.
