
There is something almost magical about the moment alcohol ink meets wet resin. Colors bloom outward, tendrils form without the help of a brush, and no two pours ever turn out exactly the same. That unique behavior is why alcohol ink resin techniques have become so popular among resin artists, DIY makers, and creators looking to add depth and movement to their projects. From the Petri Dish Effect and Cloud Effect to layered transparency and direct drop marbling, alcohol ink can create patterns that are difficult to achieve with any other resin colorant.
In this guide, we cover the most popular alcohol ink resin techniques, explain how each one works, and walk through step-by-step instructions you can try at home. We also share recommended ink ratios, realistic difficulty levels, and the common mistakes that can ruin a pour, including muddy colors, fading reds and pinks, overworking the ink, and adding too much alcohol ink to resin.
The perspective in this guide comes from our own workshop. At bitcraftart, we use many of the techniques below to color the resin in every lamp we make. The notes here are drawn from thousands of pours in our small studio in Hanoi, Vietnam — what works, what quietly fails, and the small adjustments that decide whether a piece becomes a finished lamp or an expensive lesson. Whether you’re trying these techniques yourself or simply curious about how a resin lamp gets its color, you should find what follows useful.
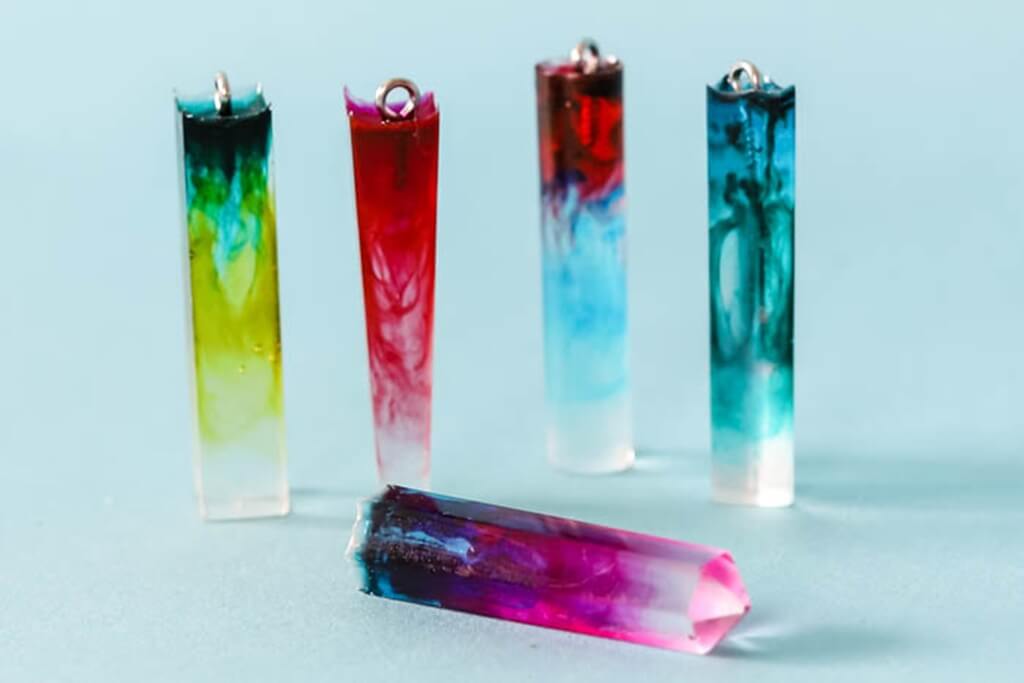
Can You Use Alcohol Ink in Resin?
Yes, you can use alcohol ink in resin, and it is one of the most popular ways to add transparent color and organic patterns to epoxy resin projects.
Alcohol ink is made from dye suspended in an alcohol carrier, typically isopropyl alcohol. When added to wet resin in small amounts, the alcohol evaporates quickly while the dye remains dispersed throughout the resin. This allows the color to move, spread, and create distinctive effects without permanently clouding the resin.
This behavior is what makes many alcohol ink resin techniques possible. Unlike opaque pigments, alcohol ink does not simply sit in place. It blooms, flows, and reacts to the resin around it, creating natural-looking movement that resin artists use for effects such as:
- The Petri Dish Effect
- The Cloud Effect
- Layered Transparency
- Direct Drop Marbling
- Timed Pouring
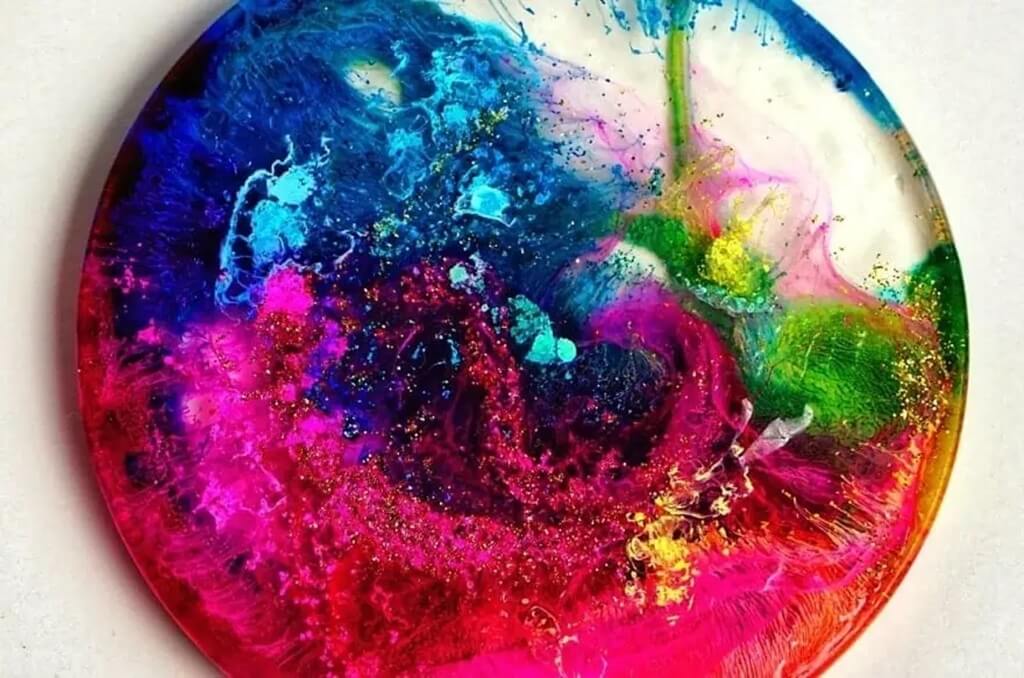
Another reason alcohol ink is widely used in resin art is its translucency. When used correctly, it preserves much of the resin’s natural clarity instead of blocking light. This makes it particularly useful for projects where light transmission matters, including resin lamps, decorative light sculptures, embedded floral pieces, and layered casting projects.
That said, more ink is not always better. Adding excessive amounts of alcohol ink can introduce too much alcohol into the mixture, which may affect curing performance or leave the finished piece softer than expected. As a general starting point, many resin artists use 1 to 2 drops of alcohol ink per ounce (30 ml) of mixed resin and increase gradually when deeper color is needed.
Understanding how alcohol ink behaves inside resin is the foundation for every technique covered below. Once you know how the dye moves, sinks, spreads, or stays suspended, it becomes much easier to control the final result.
3D & Casting Alcohol Ink Resin Techniques
These alcohol ink resin techniques happen inside a mold, with the ink added directly into wet resin to create depth, movement, and dimensional color effects. Unlike surface techniques, which work mainly on the top layer, casting techniques allow the ink to move through the resin itself, producing patterns that develop in three dimensions.
Many of the most recognizable alcohol ink resin effects fall into this category, including the Petri Dish Effect, Cloud Effect, Layered Transparency, and Timed Pouring. The good news is that most of them can be done at home with basic resin supplies. The main differences come down to timing, layering, and how much you allow the ink to move naturally.
Before You Start: Alcohol Ink Ratio Guidelines
Across all casting techniques, using the right amount of alcohol ink matters.
- For a light transparent tint: 1–2 drops of alcohol ink per ounce (30 ml) of mixed resin
- For stronger color: increase gradually in small increments
- As a general rule, avoid exceeding roughly 6% of the total resin volume
Adding too much alcohol ink introduces excess alcohol into the mixture, which can interfere with curing and leave the finished piece soft, sticky, or partially uncured. When in doubt, start with less ink and build intensity in future pours.
1. The Petri Dish Effect
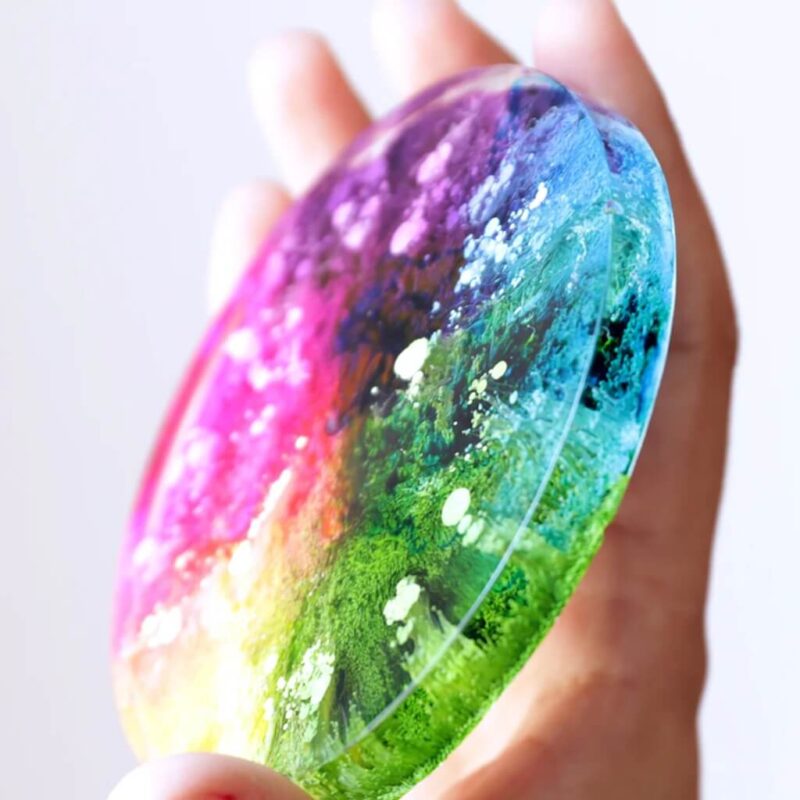
What it looks like: Organic tendrils, cellular patterns, and layered color movement that resembles fluids interacting under a microscope. Every pour develops differently, making this one of the most distinctive alcohol ink resin techniques for beginners and experienced makers alike.
And you may all know this, the Petri Dish Effect remains one of the most popular resin techniques because it creates complex-looking results with relatively simple materials and steps.
How hard is it? Beginner-friendly. The biggest challenge is resisting the urge to keep adjusting the design after the ink is added.
What you need:
- Mixed epoxy resin and hardener
- 2–4 colors of alcohol ink
- White alcohol ink
- Silicone mold
- Pipette or dropper
Step by step:
- Mix and pour your resin according to the manufacturer’s instructions.
- Remove surface bubbles with a quick pass of a heat gun.
- Add 3 to 4 drops of your first alcohol ink color.
- Add a second color nearby rather than directly on top.
- Add white alcohol ink over the colored drops.
- Repeat the color-and-white sequence several times.
- Leave the piece completely undisturbed while curing.
Why white alcohol ink matters
White alcohol ink contains titanium dioxide, making it heavier than most dye-based alcohol inks. As it sinks through the resin, it pushes the colored ink downward and creates the characteristic cells and tendrils associated with the Petri Dish Effect.
Mistakes to avoid:
- Stirring or swirling after adding ink
- Using too many colors in one pour
- Adding ink after the resin has started to gel
- Assuming red, pink, and purple inks will always remain stable after curing
One common surprise for beginners is that some red-spectrum dyes may fade or change significantly in resin. This issue is discussed frequently within resin-making communities and is one reason many artists test these colors before using them in finished projects.
2. The Cloud Effect
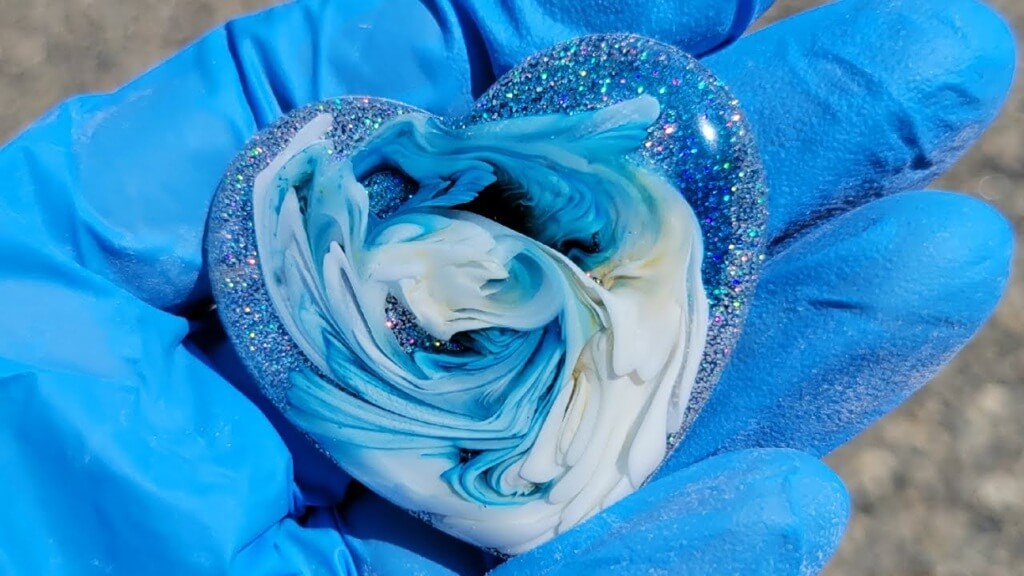
What it looks like: Soft plumes suspended inside colored resin, creating the appearance of clouds, mist, smoke, or floating atmospheric layers.
Among 3D alcohol ink resin techniques, the Cloud Effect is often chosen when makers want a more controlled and sculptural look than the Petri Dish Effect. Instead of focusing on cellular patterns, the goal is to build visible layers of color and white space.
The cloud effect is also the foundation of much of our underwater work. Layered white blooms suspended inside cool teal resin recreate the soft mist you see beneath the surface of clear water, and it’s what gives each ocean resin lamp its sense of depth without obscuring the elements suspended inside. The same technique that creates a sky inside a sphere creates an ocean inside a slab — only the color palette changes.
How hard is it? Beginner to intermediate. The process itself is straightforward, but learning how much layering produces the desired result takes practice.
Step by step:
- Pour your resin and remove bubbles.
- Add your chosen color.
- Place white alcohol ink directly on top of the colored ink.
- Repeat alternating layers of color and white in the same location.
- Continue building depth until you achieve the desired effect.
- Cure without disturbing the resin.
Tips for better cloud effects:
- Deep molds produce stronger dimensional results.
- Sphere molds often showcase the effect particularly well.
- Limiting your palette to one or two colors usually creates cleaner cloud formations.
- Allow gravity and the resin’s natural movement to do most of the work.
If you want softer cloud edges, some resin artists lightly dilute white alcohol ink with isopropyl alcohol before application. Testing on a small sample first is recommended because results vary between ink brands and resin formulations.
Mistakes to avoid:
- Dropping white ink beside the color instead of directly on top
- Overbuilding layers until the design becomes muddy
- Using extremely shallow molds that compress the effect
- Expecting identical results between different resin brands
3. Layered Transparency
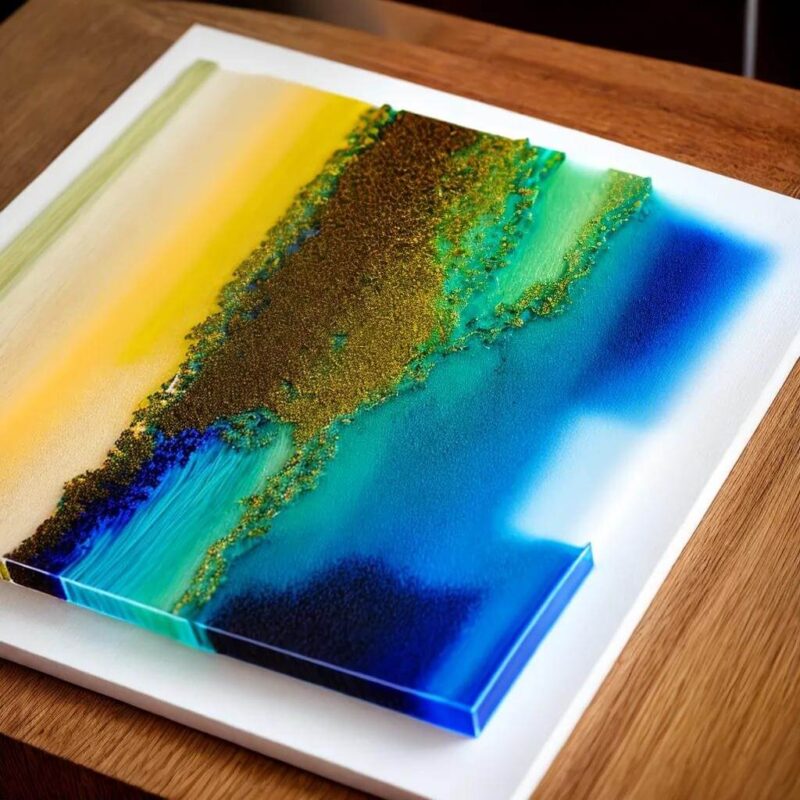
What it looks like: Distinct translucent color layers that remain visible throughout the finished piece, creating genuine physical depth rather than the illusion of depth.
This technique is especially popular for resin lamps because light passes through multiple tinted layers, producing richer color variation when illuminated.
This is one of the techniques behind our cosmic pieces. The deep indigo, violet, and navy layers inside a bitcraftart galaxy resin lamp are built one cure stage at a time, so the light from the base passes through three or four distinct atmospheres before it ever reaches the surface. That layered depth is what gives the finished lamp its sense of looking into space rather than at it.
How hard is it? Intermediate. Success depends more on timing than complexity.
Step by step:
- Pour a thin tinted resin layer.
- Allow it to reach a partial cure while remaining slightly tacky.
- Mix a fresh batch of resin and create the next layer using a different color.
- Repeat until the desired depth is achieved.
Tips for success:
- Work within related color families for smoother visual transitions.
- Consider where light will enter the finished piece.
- Keep individual layers relatively thin.
- Record cure times if you plan to recreate the design later.
The most important part of this technique is waiting for the correct cure stage between pours. Resin that is too liquid allows colors to mix together, while resin that has cured too far can create bonding problems between layers.
Mistakes to avoid:
- Pouring the next layer too early
- Waiting beyond the manufacturer’s recommended recoat window
- Using opaque pigments when transparency is the goal
- Creating dramatic color jumps that look disconnected once illuminated
4. Timed Pouring
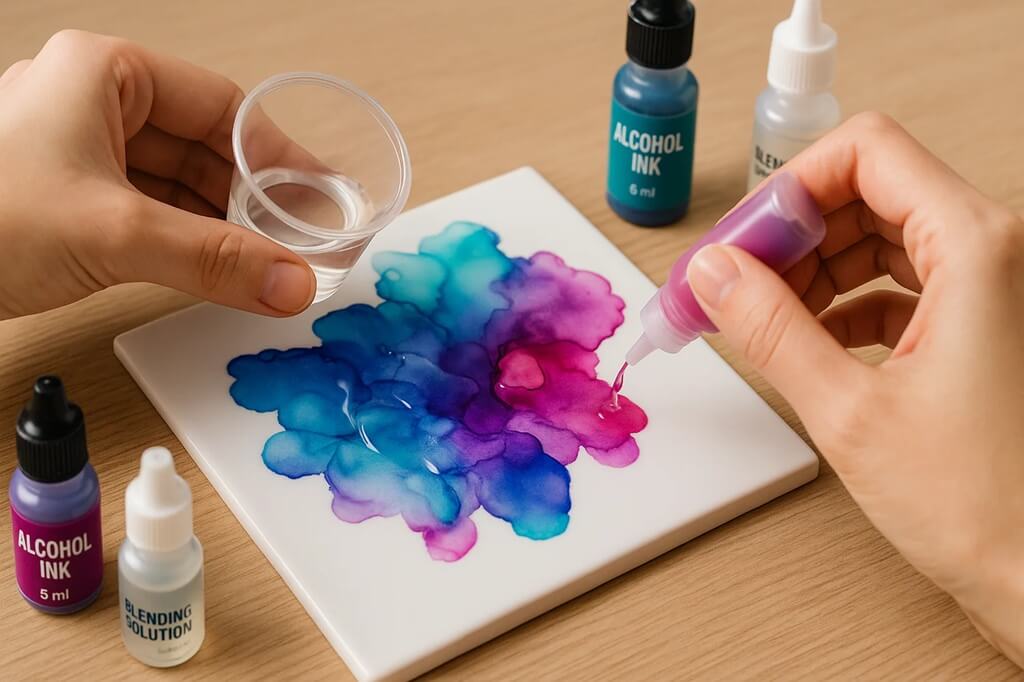
What it looks like: Different pattern structures created by changing only when the alcohol ink is added to the resin.
Timed Pouring is one of the least discussed alcohol ink resin techniques, yet it can have a major impact on the final appearance of a project. Instead of changing colors or tools, you change the resin’s viscosity by adjusting your timing.
How hard is it? Intermediate.
Why it works
Alcohol ink moves differently depending on how fluid the resin is when the ink is introduced.
- Freshly mixed resin allows the ink to travel deeper and form longer tendrils.
- Slightly thickened resin slows the movement, producing broader and more surface-focused patterns.
Method A: Immediate Application
- Mix and pour resin.
- Add alcohol ink within the first few minutes.
- Allow the ink to move naturally through the resin.
Method B: Delayed Application
- Mix and pour resin.
- Wait approximately 20–30 minutes.
- Add alcohol ink after the resin has begun to thicken slightly.
- Observe the difference in movement and pattern formation.
Tips for consistency:
- Keep notes on application times.
- Use the same resin brand when testing timing variations.
- Test multiple waiting periods to learn how your resin behaves.
For makers producing multiple pieces, timed pouring can become one of the most valuable techniques for creating repeatable results.
Mistakes to avoid:
- Waiting until the resin has entered the gel stage
- Comparing timing results across different resin brands without testing
- Changing multiple variables at the same time
- Ignoring room temperature, which can significantly affect working time
Surface & Coaster Alcohol Ink Resin Techniques
Not all alcohol ink resin techniques happen inside a mold. Many artists create the design first on a flat surface, then use resin as a protective top coat rather than the medium that carries the ink itself.
These techniques are especially popular for coasters, trays, wall art, decorative panels, and mixed-media projects because they give you far more control over placement, color blending, and composition than free-flowing casting methods. Instead of relying on gravity and resin movement, you create the design directly and preserve it under a clear resin finish.
One important difference from casting techniques is that alcohol ink on a surface often needs to be sealed before resin is applied. Without a protective barrier, the resin can reactivate the ink and cause colors to blur or shift unexpectedly.
1. Mixed Media Casting
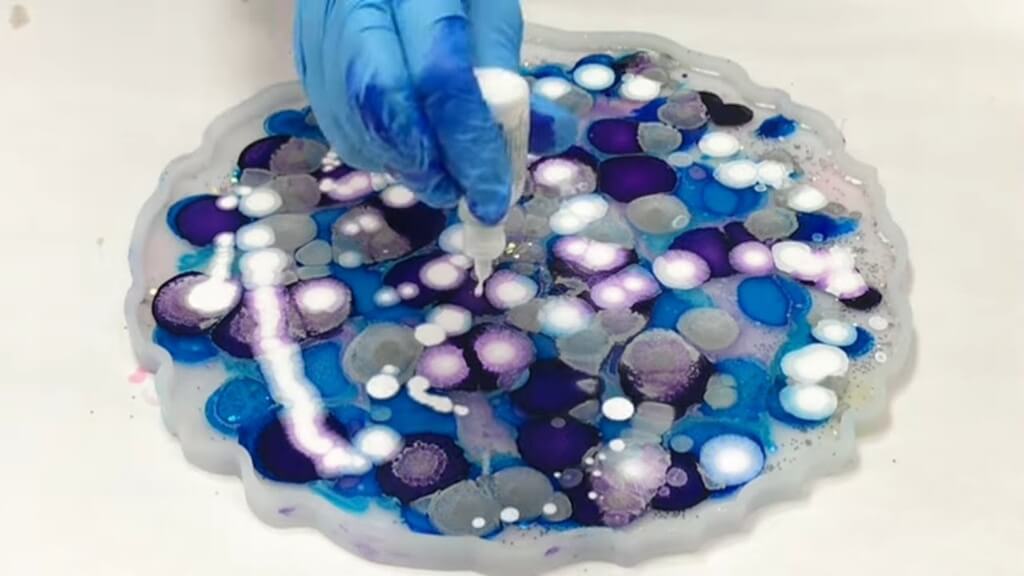
What it looks like: Alcohol ink artwork embedded beneath a clear resin layer, creating depth while preserving fine details that would be difficult to achieve directly in resin.
Among surface alcohol ink resin techniques, this approach offers the greatest creative freedom. Rather than creating the design inside the resin, you build the artwork separately and use resin as a crystal-clear protective finish.
How hard is it? Beginner to intermediate. The artwork itself can range from simple color blends to highly detailed illustrations, but the resin application is relatively straightforward.
Step by step:
- Create your alcohol ink artwork on a suitable surface such as Yupo paper, ceramic tile, synthetic paper, or sealed wood.
- Allow the piece to dry completely.
- Seal the artwork with multiple light coats of Kamar Varnish or another alcohol-ink-compatible sealer.
- Allow the sealer to cure according to the manufacturer’s instructions.
- Pour a thin layer of clear resin over the artwork.
- Remove bubbles and allow the resin to cure.
Why makers use it
This technique preserves details that would be impossible to maintain in free-flowing resin pours. It is commonly used for landscapes, abstract artwork, floral designs, geode-inspired pieces, and decorative coaster sets.
Tips:
- Yupo paper remains one of the most popular surfaces because alcohol ink moves smoothly across its non-porous surface.
- Build color gradually instead of flooding the surface with ink.
- Use resin primarily as protection and depth enhancement, not as a correction tool.
Mistakes to avoid:
- Applying resin directly over unsealed alcohol ink
- Using absorbent paper that causes uncontrolled spreading
- Rushing the drying process before sealing
- Applying thick resin layers immediately instead of gradually building depth
2. Stamping with Alcohol Ink
What it looks like: Crisp stamped designs combined with flowing alcohol ink backgrounds, creating a balance between structure and organic movement.
This technique combines the precision of stamping with the fluid nature of alcohol ink. It is particularly popular for decorative panels, coaster sets, personalized gifts, and mixed-media artwork.
How hard is it? Beginner.
Step by step:
- Create an alcohol ink background on Yupo paper, tile, or another non-porous surface.
- Let the ink dry completely.
- Stamp the design using a permanent archival ink.
- Allow the stamped image to dry thoroughly.
- Seal the artwork.
- Apply a resin top coat.
Tips:
- High-contrast black stamps tend to stand out best against colorful alcohol ink backgrounds.
- Simple geometric patterns often remain clearer than highly detailed stamps.
- Test stamp placement on scrap material before working on a finished piece.
Why archival ink matters
Many dye-based stamp inks can reactivate when resin is applied. Archival pigment inks are generally more resistant to solvents and help preserve sharp lines beneath the resin layer.
Mistakes to avoid:
- Stamping before the alcohol ink has dried
- Using water-based stamp ink
- Applying resin before the stamped image is fully set
- Choosing overly intricate stamp designs that disappear against busy backgrounds
3. Direct Drop Marbling
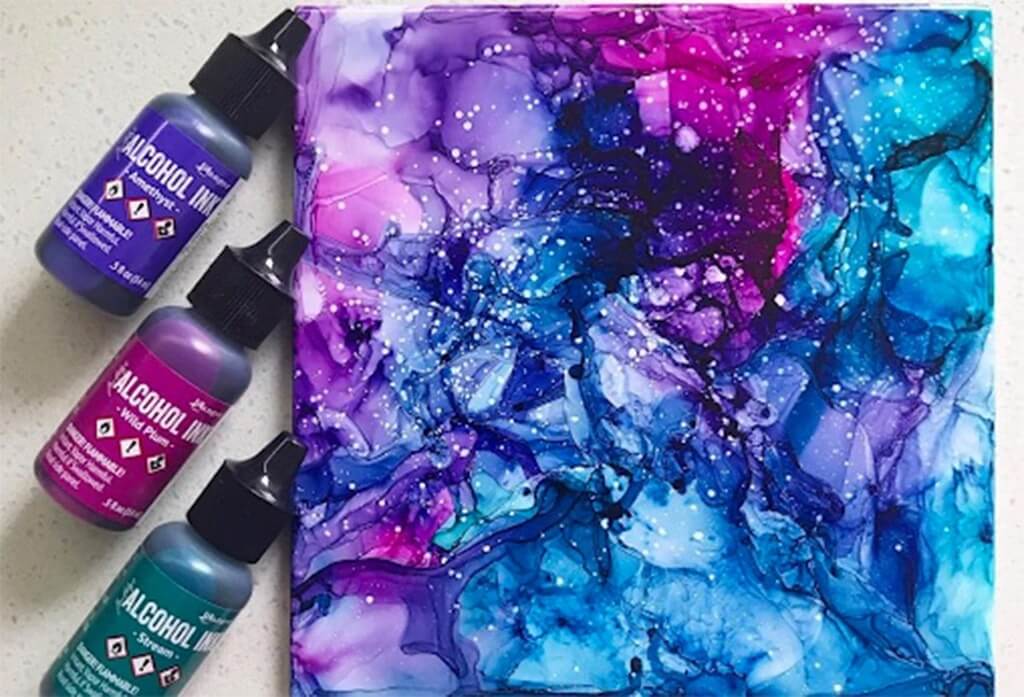
What it looks like: Flowing ribbons and veins of color spreading naturally across the resin surface, similar to marble, agate, or fluid art patterns.
Direct Drop Marbling is one of the simplest alcohol ink resin techniques to learn because it relies on the natural interaction between ink and wet resin rather than precise layering or complex tools.
How hard is it? Beginner.
Step by step:
- Pour a layer of clear resin into your mold or onto your surface.
- Add several drops of alcohol ink in different areas.
- Use a toothpick, needle, or resin tool to gently pull colors together.
- Stop as soon as visible marbling forms.
- Remove bubbles and cure.
Tips:
- Limit yourself to two or three colors for cleaner results.
- Choose colors that blend well when they meet.
- Small movements often create better marbling than extensive mixing.
- Testing color combinations on scrap resin can prevent muddy results.
Why it works
Alcohol ink naturally spreads through wet resin. By making only a few controlled movements, you encourage the colors to interact while preserving distinct veins and patterns.
Mistakes to avoid:
- Overworking the design
- Mixing repeatedly in the same area
- Combining colors that produce muddy intermediate shades
- Adding too many colors at once
A useful rule for beginners is to stop earlier than you think you should. Most muddy marbling happens not because of the colors themselves, but because the resin has been disturbed too many times.
Mixing & Tinting Alcohol Ink Resin Techniques
While many alcohol ink resin techniques rely on movement and unpredictability, these techniques focus on control. Instead of encouraging the ink to spread, sink, or bloom through the resin, the goal is to place color exactly where you want it and keep it there.
These methods are commonly used for background layers, color foundations, fine-detail work, and projects where consistency matters more than dramatic effects. They are also some of the easiest alcohol ink resin techniques for beginners because they require less timing and fewer variables than casting techniques such as the Petri Dish Effect or Cloud Effect.
1. Colored Resin Base
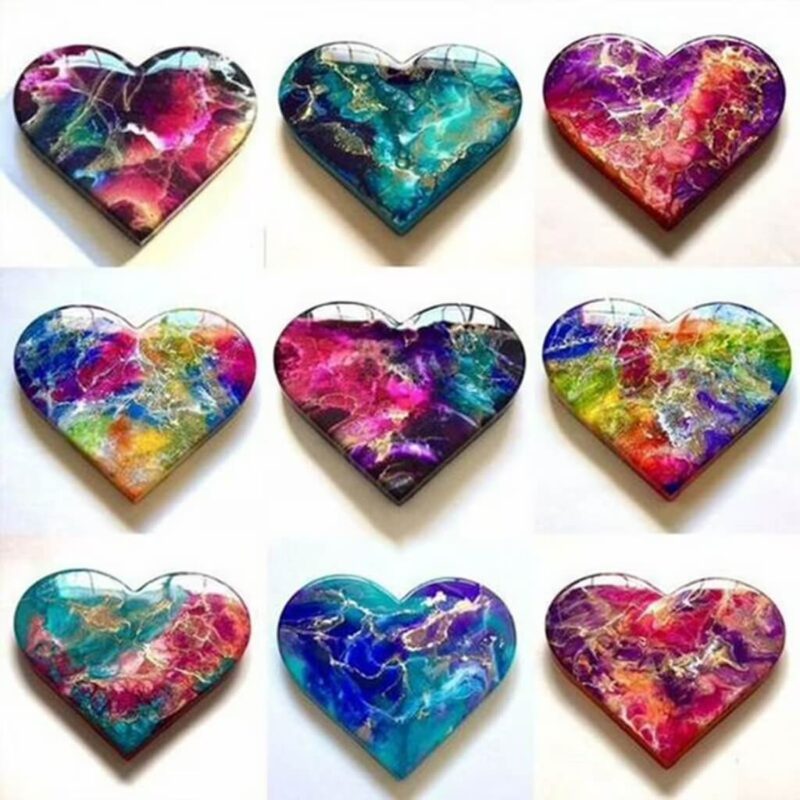
What it looks like: A uniformly tinted resin layer with consistent color throughout. Instead of patterns or movement, the result is a smooth, even wash of color.
This is one of the most practical alcohol ink resin techniques because it serves as the foundation for many other designs. A colored base can stand on its own or support layered transparency, floral casting, petri effects, and other advanced techniques.
How hard is it? Beginner. This is one of the most predictable techniques in resin art.
Step by step:
- Mix your resin and hardener according to the manufacturer’s instructions.
- In a separate cup, add 1–2 drops of alcohol ink per ounce (30 ml) of mixed resin.
- Stir slowly until the color is evenly distributed.
- Test a small amount on white paper to evaluate color intensity.
- Adjust gradually if deeper color is needed.
- Pour into your mold and cure.
Tips:
- Start with less ink than you think you need. Alcohol ink is highly concentrated.
- Dye-based alcohol inks create translucent color that still allows light to pass through.
- For resin lamps and illuminated pieces, transparent color often produces more attractive results than opaque pigments.
- Colored bases work particularly well beneath petri dish or cloud effects because they add depth without competing with the pattern above.
Mistakes to avoid:
- Adding too much ink too quickly
- Judging the final color before the resin cures
- Using opaque pigments when transparency is the goal
- Mixing aggressively and introducing unnecessary bubbles
2. The Clean Drop
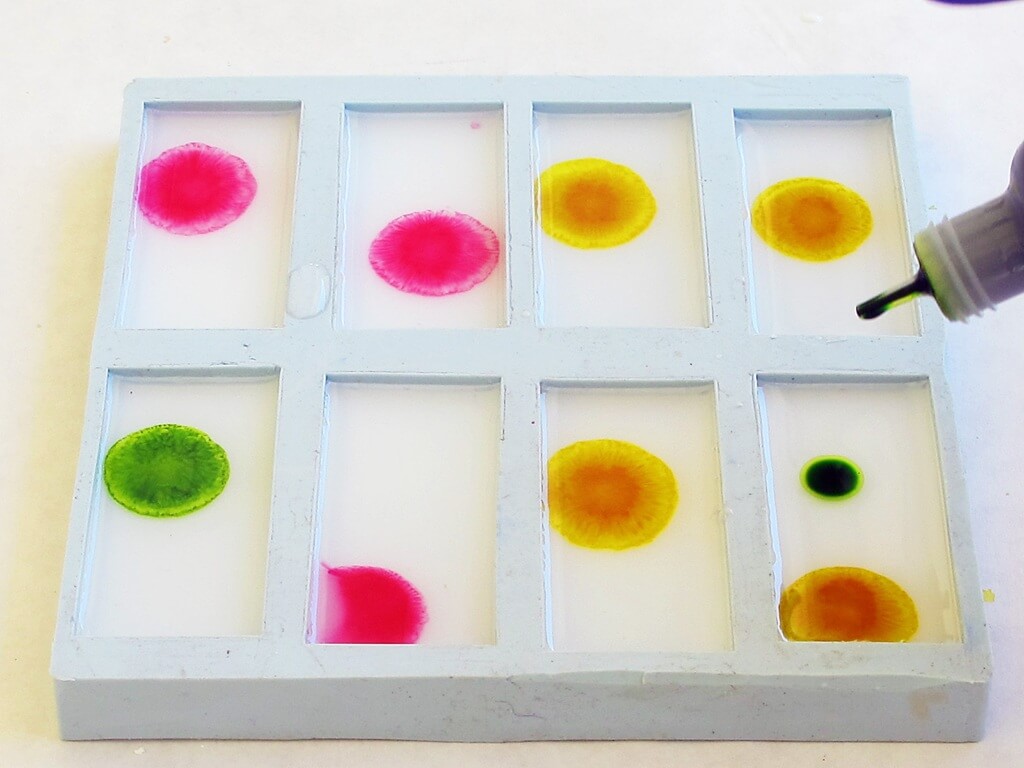
What it looks like: Distinct drops of color suspended within clear resin, each retaining its own shape rather than blending into neighboring colors.
The Clean Drop technique demonstrates an important lesson in resin art: sometimes doing less produces a better result. Instead of manipulating the ink after placement, you allow the resin to do the work naturally.
How hard is it? Beginner.
Step by step:
- Pour clear resin into your mold.
- Use a pipette or precision dropper to place alcohol ink exactly where you want it.
- Space drops deliberately to allow for natural spreading.
- Resist the urge to swirl, stir, or drag the ink.
- Cure the piece undisturbed.
Tips:
- Two or three colors typically create cleaner designs than larger palettes.
- Symmetrical layouts often produce surprisingly elegant results.
- Gradients can be created by placing darker colors on one side and lighter colors on the other.
- Deep molds showcase the suspended color effect particularly well.
Why it works
Alcohol ink naturally spreads when it contacts resin. By leaving the drops untouched, you preserve the organic edges and subtle movement that make the design visually interesting.
Mistakes to avoid:
- Placing drops too close together
- Using too many colors in a small area
- Disturbing the resin after placement
- Adding additional drops after the resin begins thickening
As a general guideline, leave at least 1 cm (⅜ inch) between drops. Alcohol ink continues spreading after application, and colors that start too close together often merge unexpectedly.
3. Pin Piercing
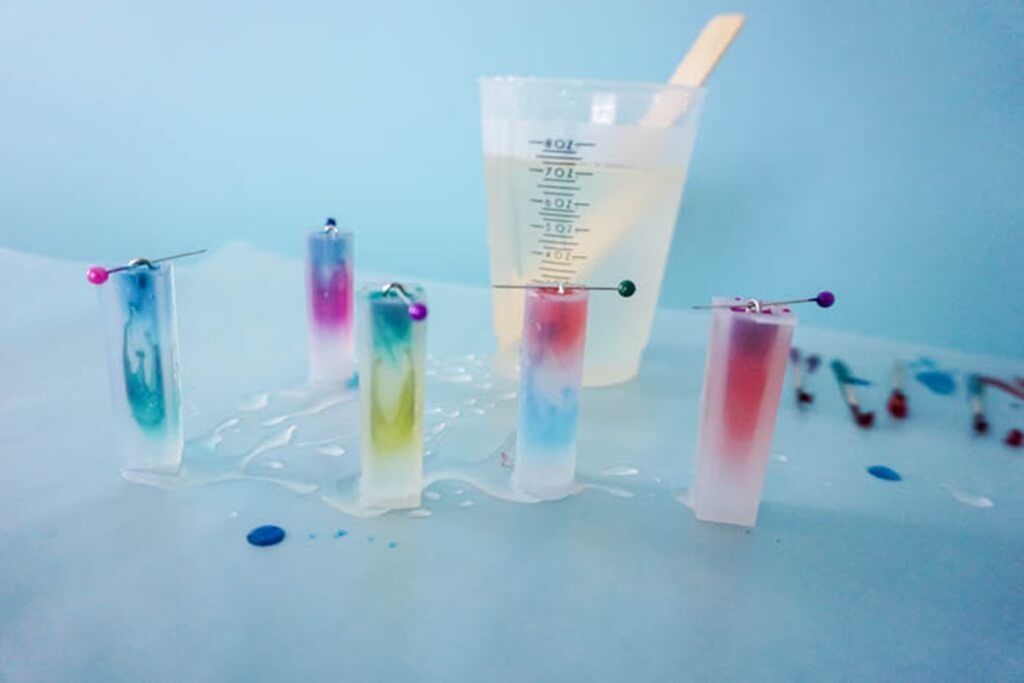
What it looks like: Fine veins, lace-like lines, and delicate details created by dragging a sharp tool through wet ink suspended in resin.
Among mixing and tinting alcohol ink resin techniques, Pin Piercing offers some of the highest precision. It is often used as a finishing technique rather than a standalone design, adding detail to patterns that already exist.
How hard is it? Intermediate to advanced.
Step by step:
- Create your primary design using a colored base, clean drop arrangement, or marbled pattern.
- While the resin is still fluid, use a fine pin, needle, or syringe tip to pull through selected areas.
- Work in deliberate single strokes.
- Stop once the desired detail is achieved.
- Remove any surface bubbles and allow the resin to cure.
Tips:
- Finer tools create cleaner and more precise lines.
- Geode-style designs often benefit from subtle pin-pierced details.
- Less is usually more. A few carefully placed lines often look better than extensive dragging.
- Practice on small test pieces before attempting highly detailed designs.
Why makers use it
Pin Piercing gives you a level of control that is difficult to achieve through natural ink movement alone. It allows you to refine patterns, create visual direction, and add intricate details without introducing additional colors.
Mistakes to avoid:
- Using a tool with a tip that is too large
- Pressing deeply into the resin
- Making repeated passes through the same area
- Attempting detailed work after the resin has started to gel
One of the most common beginner mistakes is treating Pin Piercing like drawing. Unlike pen and paper, resin responds best to a few intentional movements. Repeated strokes tend to blend colors together and reduce the crisp detail you are trying to create.
What Alcohol Ink to Use in Resin: Dye-Based vs. Pigment-Based
Choosing the right alcohol ink matters just as much as choosing the right technique.
Many beginners assume all resin colorants behave the same way, but the differences between dye-based and pigment-based products explain why some techniques create flowing tendrils, others create solid color, and some colors fade faster than expected.
In simple terms:
- Dye-based alcohol inks create transparency, movement, and organic effects.
- Pigment-based colorants create opacity, stronger coverage, and better long-term color stability.
The best choice depends on the result you want to achieve.
Understanding the Difference
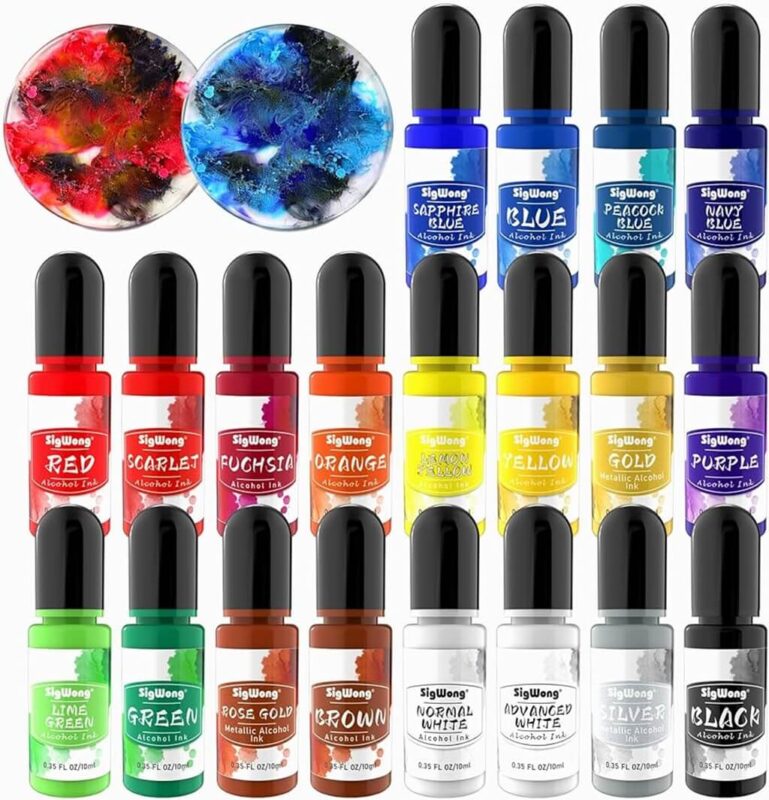
Most alcohol inks sold for crafting are dye-based. Popular brands such as Jacquard Piñata, Ranger Tim Holtz Adirondack, and Copic Various Ink use dyes suspended in an alcohol carrier.
When added to resin, the alcohol evaporates and leaves the color behind. Because the dye remains transparent, light can still pass through the resin. This is why dye-based inks are responsible for effects such as blooming, sinking, marbling, and layered transparency.
Pigment-based resin colorants work differently. Instead of dissolved dye molecules, they contain tiny solid particles suspended throughout the mixture. These particles block light more effectively, create stronger coverage, and tend to stay where they are placed rather than flowing naturally through the resin.
As a result, pigment-based products excel when you want solid color, while dye-based inks excel when you want movement and translucency.
Which Type Works Best for Each Alcohol Ink Resin Technique?
| Technique | Recommended Colorant | Why It Works |
| Petri Dish Effect | Dye-based alcohol ink + white sinking ink | The color needs to flow while the heavier white creates the sinking effect. |
| Cloud Effect | Dye-based alcohol ink + white sinking ink | The contrast between flowing color and dense white creates the cloud structure. |
| Layered Transparency | Dye-based alcohol ink | Transparent color allows light to travel through multiple layers. |
| Timed Pouring | Dye-based alcohol ink | The technique relies on how the dye moves through resin at different viscosities. |
| Mixed Media Casting | Dye-based alcohol ink | Designed for creating artwork before resin is applied. |
| Stamping | Dye-based alcohol ink background with archival stamp ink | Provides color movement while preserving sharp stamped details. |
| Direct Drop Marbling | Dye-based alcohol ink | Encourages natural color interaction and flowing veins. |
| Colored Resin Base | Dye-based for translucent color, pigment-based for opaque color | The choice depends on the desired appearance. |
| Clean Drop | Dye-based alcohol ink | Maintains transparency and controlled spreading. |
| Pin Piercing | Dye-based alcohol ink | Allows precise manipulation while the ink remains mobile. |
Why Do Some Alcohol Ink Colors Fade in Resin?
One of the most common frustrations among resin artists is watching a vibrant color fade, shift, or disappear after curing.
This issue is especially common with some red, pink, magenta, and purple shades.
The reason comes down to the nature of dyes themselves. Compared with pigments, dyes are generally less resistant to UV exposure and chemical changes within resin systems. Certain color families are particularly vulnerable, which is why some makers notice dramatic changes shortly after curing or after prolonged exposure to sunlight.
This does not mean alcohol ink is unsuitable for resin. It simply means some colors require extra testing before they are used in important projects.
How to Reduce Fading Problems
If long-term color stability is important, these practices can help:
- Choose resin formulas that contain UV stabilizers.
- Test reds, pinks, and magentas in a small sample pour before starting a final project.
- Keep finished pieces away from direct sunlight whenever possible.
- For resin lamps, use dye-based alcohol ink for special effects and consider pigment-based colorants for large color fields that need maximum longevity.
- Seal surface artwork before applying resin top coats.
For most alcohol ink resin techniques, dye-based inks remain the preferred choice because they produce effects that pigments simply cannot replicate. The key is understanding when transparency and movement matter most, and when durability should take priority.
If you’d rather see these techniques in finished form than reproduce them at home, our full collection is the result of exactly the trial and patience this guide describes.
Shop Handcrafted Resin Lamps
More About Alcohol Ink Resin Techniques: FAQs
How do you use alcohol inks with resin?
There are two common ways to use alcohol ink with resin:
- Mix it directly into resin to create a transparent colored base.
- Drop it into wet resin after pouring to create effects such as petri dish patterns, cloud formations, marbling, and layered color movement.
For most alcohol ink resin techniques, start with 1–2 drops of ink per ounce (30 ml) of mixed resin and increase gradually if stronger color is needed. Using too much ink can affect curing and reduce clarity.
For best results, work in a well-ventilated space and follow the resin manufacturer’s recommended mixing ratio and working time.
What are common alcohol ink art techniques?
Alcohol ink techniques generally fall into three categories:
3D & Casting Techniques
- Petri Dish Effect
- Cloud Effect
- Layered Transparency
- Timed Pouring
Surface & Coaster Techniques
- Mixed Media Casting
- Stamping with Alcohol Ink
- Direct Drop Marbling
Mixing & Tinting Techniques
- Colored Resin Base
- The Clean Drop
- Pin Piercing
Each category creates a different visual effect, ranging from organic flowing patterns to highly controlled color placement.
How do you seal alcohol ink before resin?
Sealing is important when alcohol ink has been applied to a surface such as Yupo paper, ceramic tile, canvas, or wood before a resin top coat is added.
A common approach is:
- Allow the alcohol ink artwork to dry completely for 24–48 hours.
- Apply 3–5 light coats of Kamar Varnish.
- Allow each coat to dry before applying the next.
- Add 1–2 coats of a UV-resistant clear spray if additional fade protection is needed.
- Let the surface cure fully before applying resin.
Skipping the sealing step can cause alcohol ink to reactivate and blur when it comes into contact with wet resin.
What is the best alcohol ink for resin?
The best alcohol ink depends on the technique you plan to use.
- For petri dish and cloud effects: Jacquard Piñata Colors and Ranger Tim Holtz Alcohol Ink are popular choices because they flow well and create strong color contrast.
- For layered transparency and resin lamps: Jacquard Piñata is often preferred because of its vibrant transparent colors and good light transmission.
- For beginners: Ranger Tim Holtz Alcohol Ink offers a wide color range and is easy to find in craft stores and online marketplaces.
- For fine-detail work: Copic Various Ink provides excellent color consistency and precise control.
Regardless of the brand, it is always worth testing red, pink, and magenta shades in a small sample pour before using them in a finished project. These color families are more likely to fade or shift in resin than other colors.
